Wow! For years I have been building PowerShell scripts to install and configure SharePoint and Project server. It has worked well and have learned a lot about PowerShell in doing so. However, I recently discovered a tool in CodePlex called AutoSPInstaller. http://autospinstaller.codeplex.com/
My first reaction to this tool was the same as using SharePoint Products Configuration Wizard. It couldn’t be that good and all being executed behind code. When I finally looked at AutoSPInstaller and discovered that it was all based on PowerShell. This perk my interested.
My first few attempts using AutoSPInstaller failed for me and my reaction was not very good. However, I kept hearing about how others were using it and so I decided to give it another chance only this time, I took a little time in reading the documentation. After examining the PowerShell code and using the “Build Farm” tool found at https://autospinstaller.com/ and with a successful installation of SharePoint and a configuration of SharePoint Farm; I WAS SOLD.
This is one of the best tools I have seen for building a SharePoint farm and documenting the farm. And it also configures other useful items to make your farm more robust such as setting up SQL alias and disabling the loop check. And it works for SharePoint and Project server 2010, 2013 and 2016. I am consistently build different SharePoint scenarios in my lab and AutoSPInstaller automates the process of setting it up.
One other item, I should mention about AutoSPInstaller. If you want to learn more about PowerShell and see good examples of modules and well written code, then dig deep into the code. I really like PowerShell and learning PowerShell techniques. AutoSPInstaller is full of many PowerShell tricks.
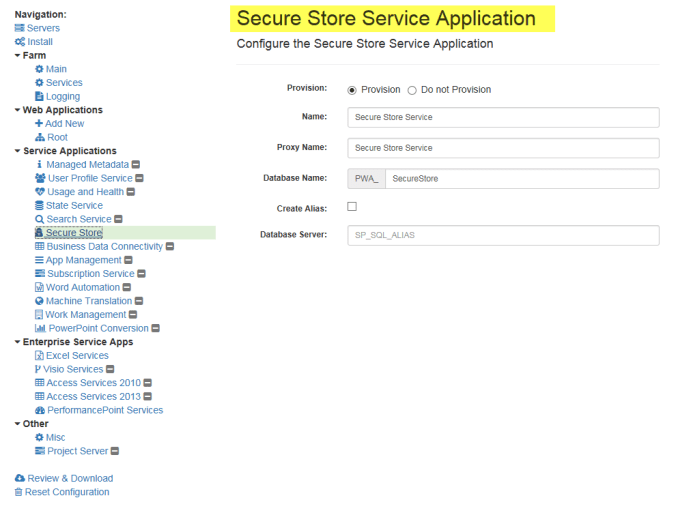
Building the SharePoint Farm XML is done by jumping to the https://autospinstaller.com/ site and then clicking “Build a Farm”. The following screen shot are for building a SharePoint farm that configures Project Server on a single server. My configuration is for the very basics services that project server typically uses such as Excel Services, Secure Store, Performance Point Service and of course project server service. I should point out project server service doesn’t always work after the installation and at times I have needed to de-provision and re-provision the project service to get it working.

Servers Page. Its purpose is to define the servers in the SharePoint farm. If only one server is being setup for the farm, then leave servers list blank. It requires either no servers or a minimum of two servers for the Share Point farm.

Installation Options page. The highlighted options are important to me.

Farm – Configure the Main Farm Options
General settings for the SharePoint configuration. I don’t like putting real password in the build farm tool, so I put in bogus passwords and replace them once I create the XML file.
I really like the database preview option. It allows you to have all the SharePoint farm databases prefixed and makes it much easier for the DBA to organize the databases.
The create alias option is a nice feature for setting this up as well. Makes it much easier to move SharePoint to another SQL server in the future.
I specify only a few managed accounts for project server deployment. If setting up for SharePoint deployment, I would add all the account in this page. It validates the username and passwords.
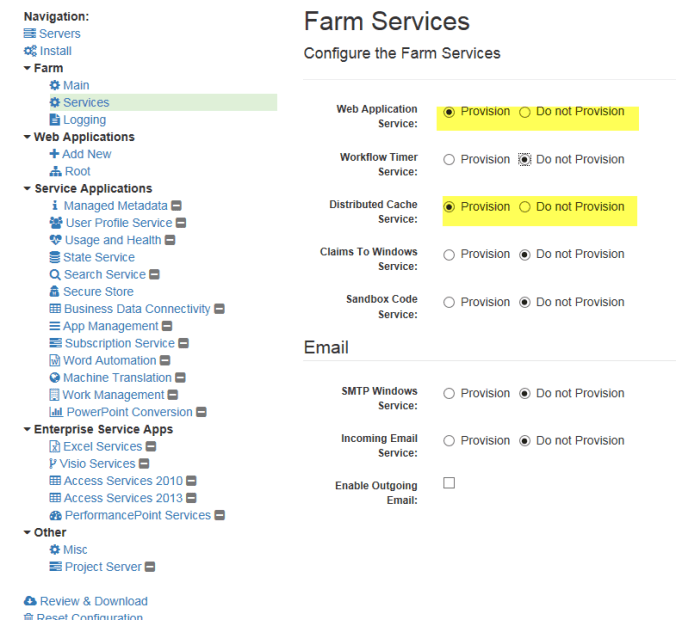
Farm Services is really depends on your requirements. I will leave it at that.

Farm Logging screen. Take the default and change it later. I had some issues, so now keep it as the default.